
globusonline client
This page includes the basic commands to use globusonline. For an overview of storage clients, see Storage clients.
Contents
GlobusOnline
About
Globus provides a web service to schedule file transfers from one storage endpoint to another. Since the service employs GridFTP as transfer protocol either the source or the sink has to be GridFTP-enabled. The Globus Online web service allows to monitor the transfer processes via the web interface and reschedules transfers automatically when they fail. Storage endpoints can be different servers or only different locations on the same server. The data transfer is executed on behalf of the user employing his/her credentials or Grid certificate.
There exists a python API which allows to steer and monitor the processes from within e.g. the data generating processes. Via this API data transfers can be easily integrated into workflows.
The service is run on the Amazon cloud located in the US.
Requirements
Globus online makes use of Grid proxies. Thus, a user needs to have:
Installation
Globus Connect
- Create an account here: https://www.globus.org/ by following the instructions.
- To transfer data one needs to define the endpoints. On servers or computers that do not run GridFTP you will first have to install the Globus Connect client software. Below we show an example on how to define your home folder on a Grid User Interface machine as endpoint:
Click on the button “Endpoints” followed by “add Globus Connect personal”
Provide a name for your endpoint e.g. ui.grid.sara.nl and press “Generate Setup Key”
Copy the “Setup Key” to your clipboard
For a linux machine as the UI, download the linux package for Globus Connect Personal
Copy the software to your home directory on the Grid user interface and unpack:
laptop$ scp Downloads/globusconnectpersonal-latest.tgz homer@ui.grid.sara.nl:
UI$ tar -xzf globusconnectpersonal-latest.tgz
Register the new endpoint by running:
cd globusconnectpersonal-*
./globusconnect -setup fd409d15-297d-4jl6-8wea-47bjs6b2bc88 # replace fd409d15-297d-4jl6-8wea-47bjs6b2bc88 with your key
# Configuration directory: /home/homer/.globusonline/lta
# Contacting relay.globusonline.org:2223
# Installing certificate and key
# Creating /home/homer/.globusonline/lta/gridmap
# Done!
Prior to employing the endpoint the client has to be started:
./globusconnect -start &
Note
These steps work for any personal (non GridFTP-enabled) server.
- Define other endpoints:
By clicking the button “Endpoints” you can search in a list with all endpoints, e.g. search for surfsara#dCache. This GridFTP endpoint points at the dCache Grid storage.
- To register your own GridFTP-enabled endpoint click on ” add Globus Connect Server endpoint” and follow the instructions there. You will need to provide MyProxy and GridFTP URLs. In case of the SURFsara Grid you will need to set
MyProxy = px.grid.sara.nlandGridFTP = gridftp.grid.sara.nl
Note
Before data can be transfered you need to register endpoints with Globus Online. This also holds true when working with another client than the web interface.
Data transfer workflow
Activating endpoints
Globus Online executes data transfers on behalf of a user. To this end it employs a Grid proxy that is provided by the user and instantiated with his/her Grid credentials/certificates. Independent from using the python API or the web interface one first has to activate the endpoints from/to which data should be transfered.
The non GridFTP-enabled endpoints like personal workstations or the home of the Grid user interface machines are activated by running:
./globusconnect -start &
To activate a GridFTP-enabled endpoint the user needs to provide the service with a Grid proxy. Start a Grid session and create a Grid proxy on the proxy server:
startGridSession lsgrid # replace lsgrid with your VO
myproxy-init --voms lsgrid -l homer # replace lsgrid with your VO and homer e.g. with your name. The username is only valid for this proxy and could be anything
After that you are asked to authenticate with your Grid certificate password and give a passphrase that will be used afterwards to export the proxy via the web interface.
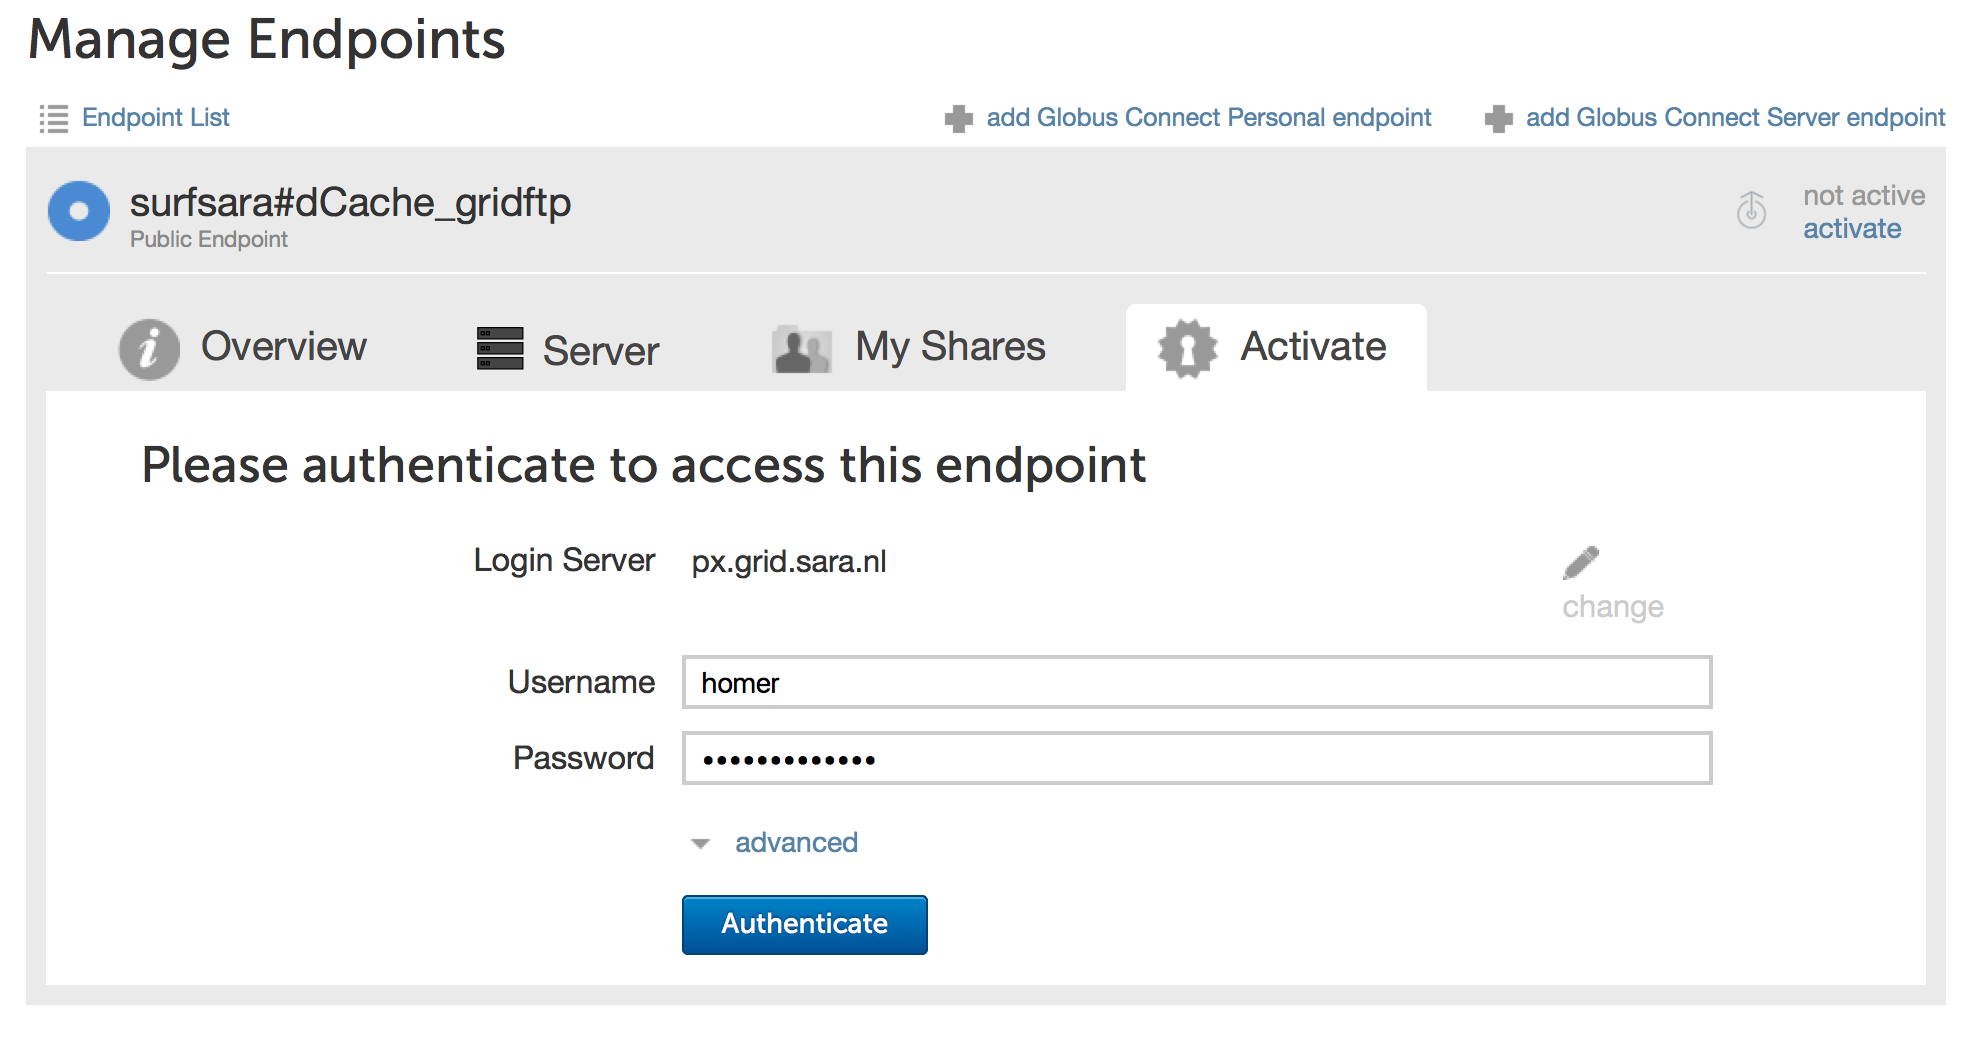
- Go to the webinterface and click “activate” the Gridftp endpoint. Provide the username and passphrase from the previous step:
Data transfers via the web interface
Data transfers can be easily started employing the web interface. You have to provide the names of the endpoints from and to which the data is transferred:
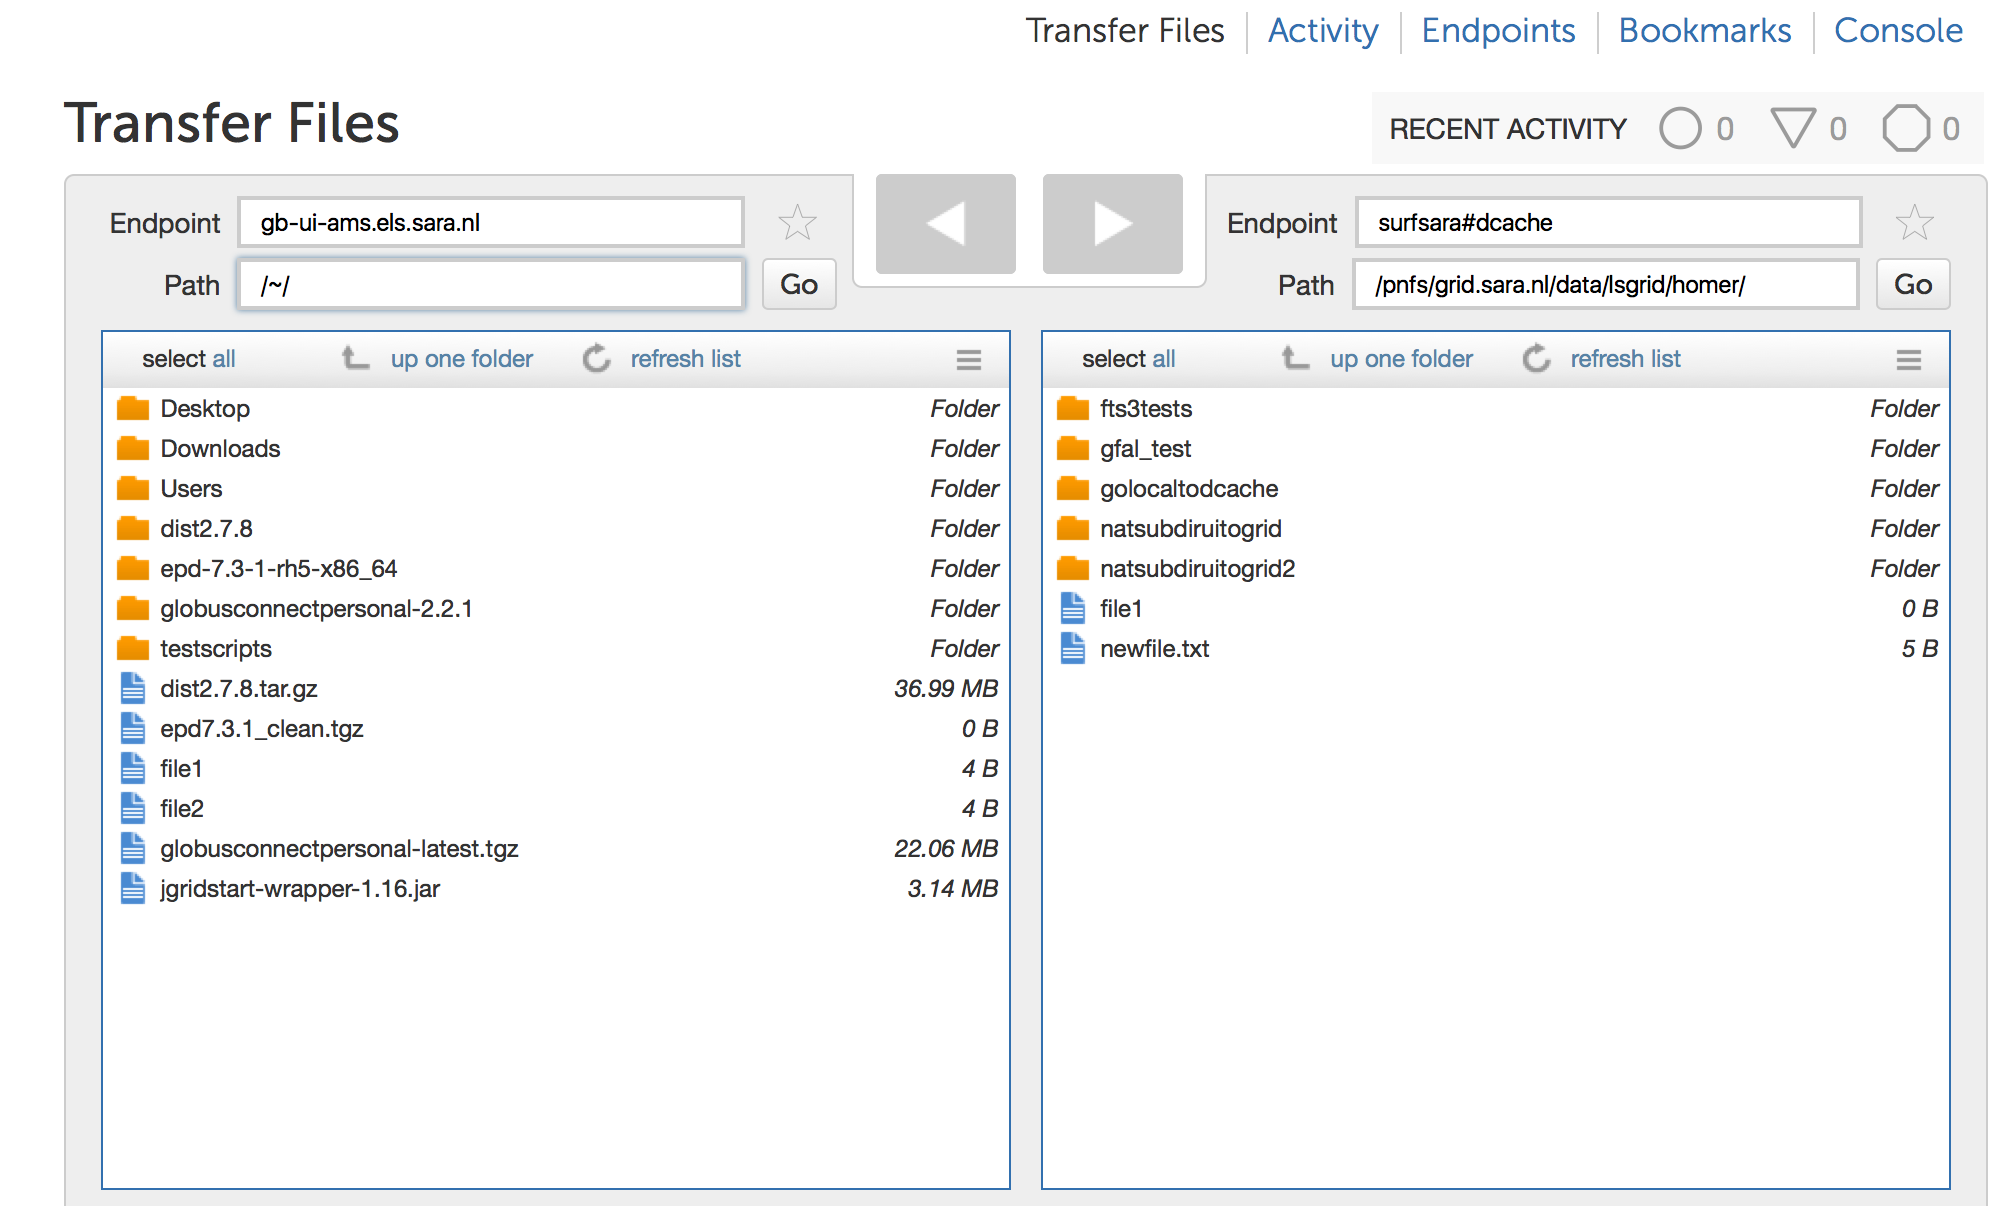
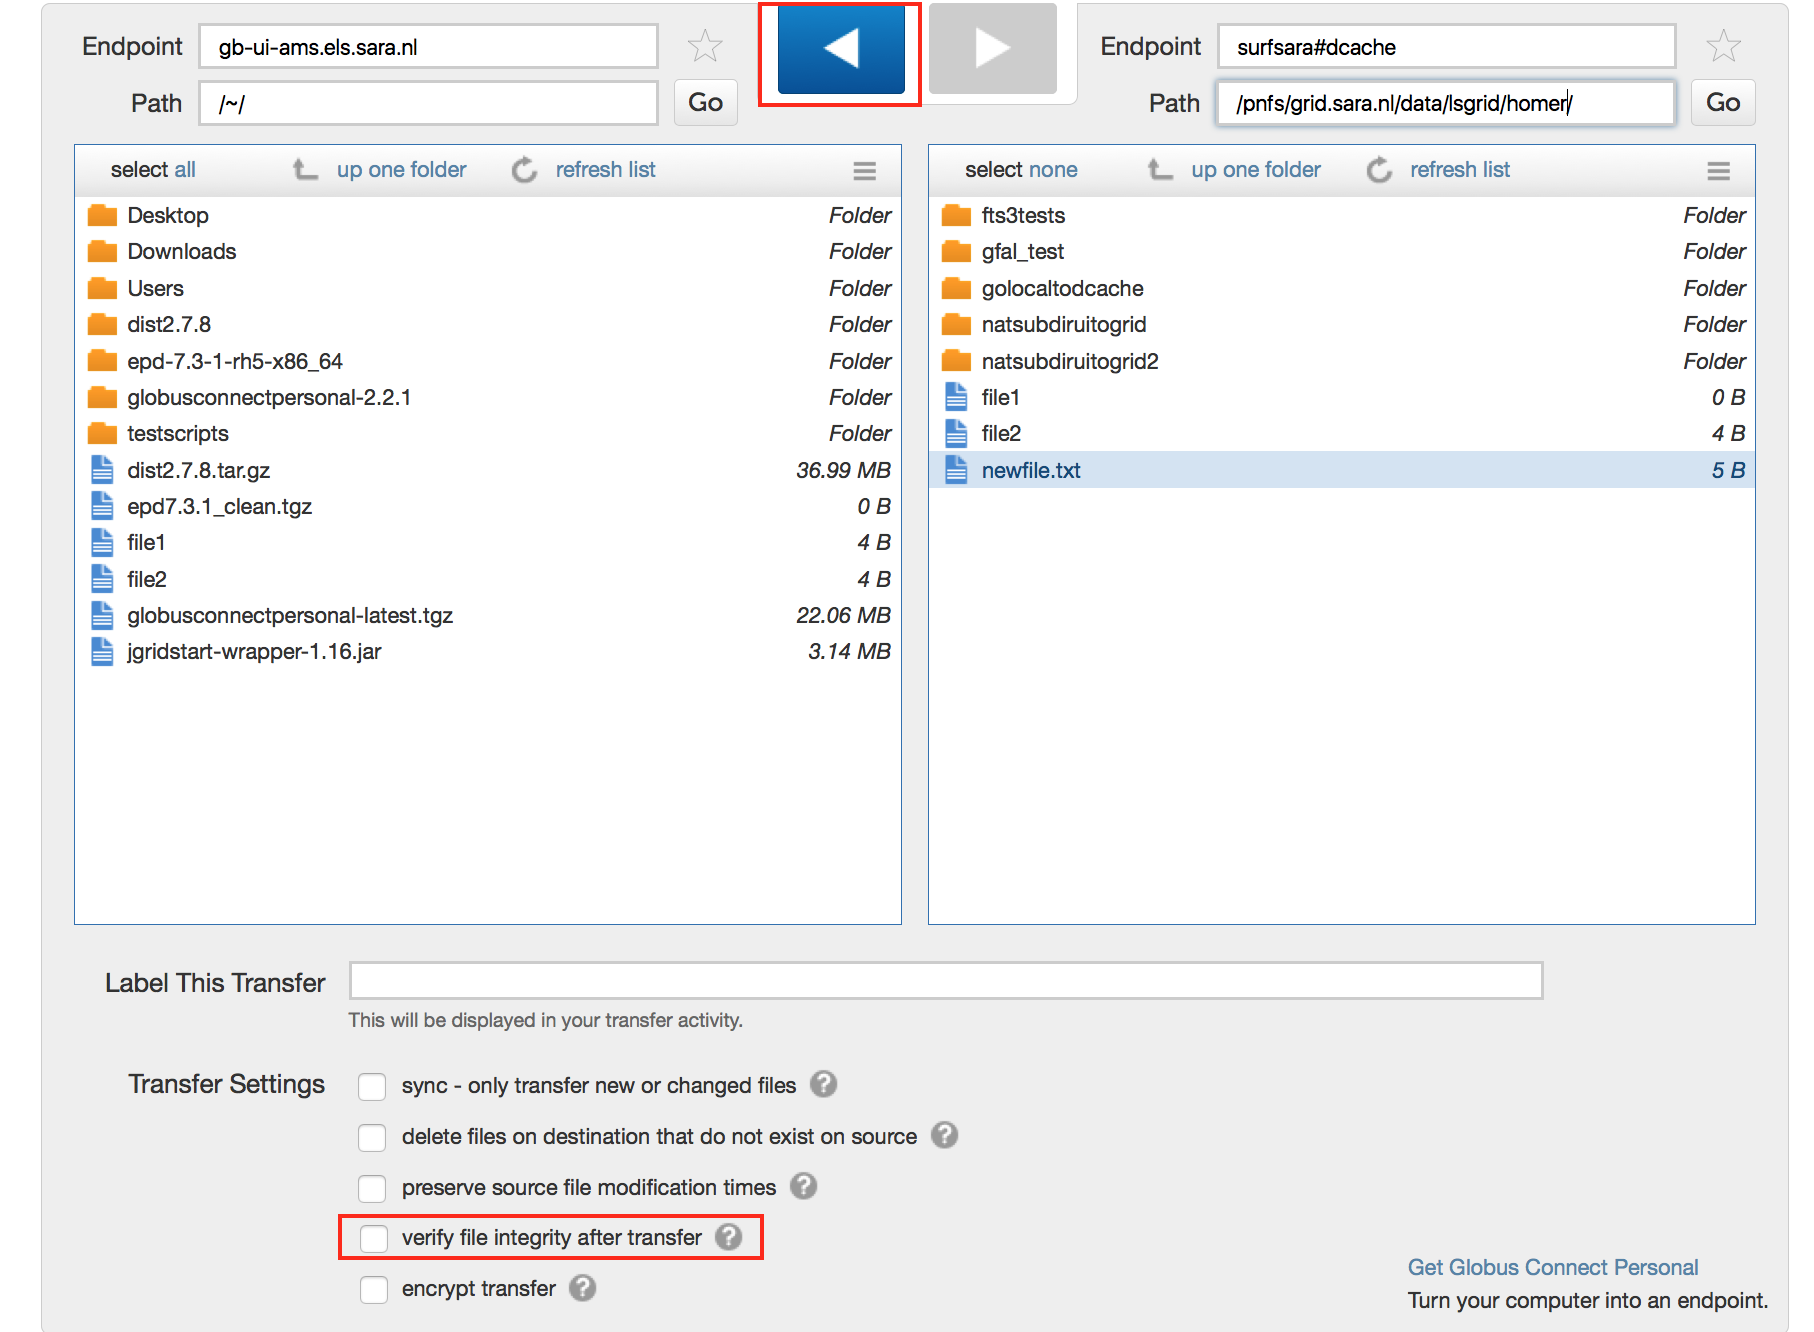
Data to be transferred is selected by marking it and then clicking one of the arrows to determine sink and source. The current state of data transfers can be monitored in the ”Activity” screen:
Warning
To enable transfers from dCache to your personal endpoint, you need to “untick” the box that verifies data integrity due to incompatible checksum methods between Globusonline and our dCache service.
GlobusOnline is an easy graphic-based way to interact with our Grid Storage, but keep in mind that recursive directory transfers can be slow and checksum verification has to be disabled in our current implementation.
